Want the latest straight to your inbox?

It doesn’t matter the holiday, kids always want to do crafts. So do I. Your goblins will love these 4 easy and oh-so-spooky Halloween projects!
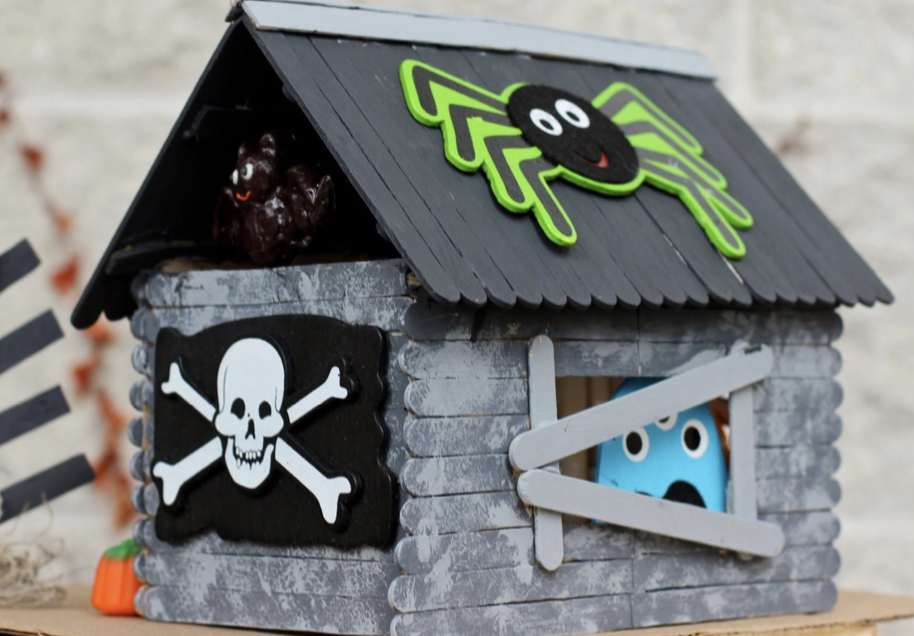
1. Haunted Popsicle Stick House
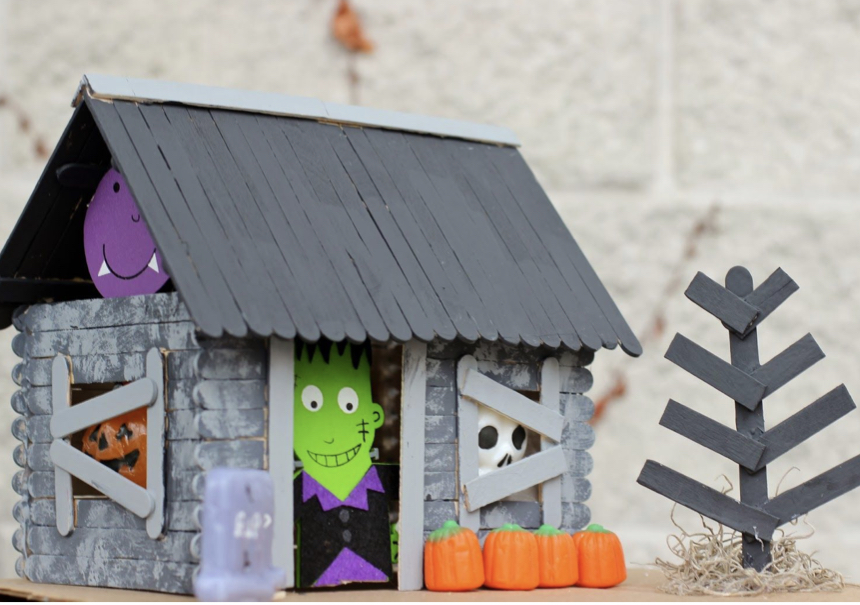
Materials:
- Popsicle sticks (different sizes)
- Glue gun
- Heavy duty scissors
- Craft paint
- Halloween decorations & candy
Directions:
1. Roof: To start, line up 20 popsicle sticks and glue five sticks in perpendicular fashion to
provide support. Repeat to make the other side of the roof. Support beams may be placed for
added decoration.
2. Front: To make the front of the house use ten popsicle sticks with two glued in perpendicular
fashion to provide support. Cut another ten sticks to size to allow space for a doorway. (I
recommend using heavy duty scissors because you’d likely break your regular scissors.) Two
sticks can be used for door framing.
3. Back: Similarly to make the back use ten popsicle sticks. cut the sticks to size to make the
window. to provide support use three sticks (two at the edges and one in the middle) glued in
perpendicular fashion. Add small popsicle sticks (or you can cut regular popsicle sticks) to make
the frame of the window.
4. Sides: Use ten uncut regular length popsicle sticks and glue two in perpendicular fashion to
provide support. if you prefer sides with windows, cut the middle four popsicle sticks to
desired window size. As above, add small popsicle sticks (or you can cut regular popsicle sticks)
to make the frame of the window.
5. Put the sides, the front, and back together one at a time and glue the edges. Hold until the
glue dries. Finally place the roof on and glue in place, and we are done!
There is a lot of room for creativity in this project, by adding all kinds of decorations or even little candy pumpkins. The less perfect it is, the more haunted it looks. Win, win!
Happily Ever After
2. Clothespin Button Bats
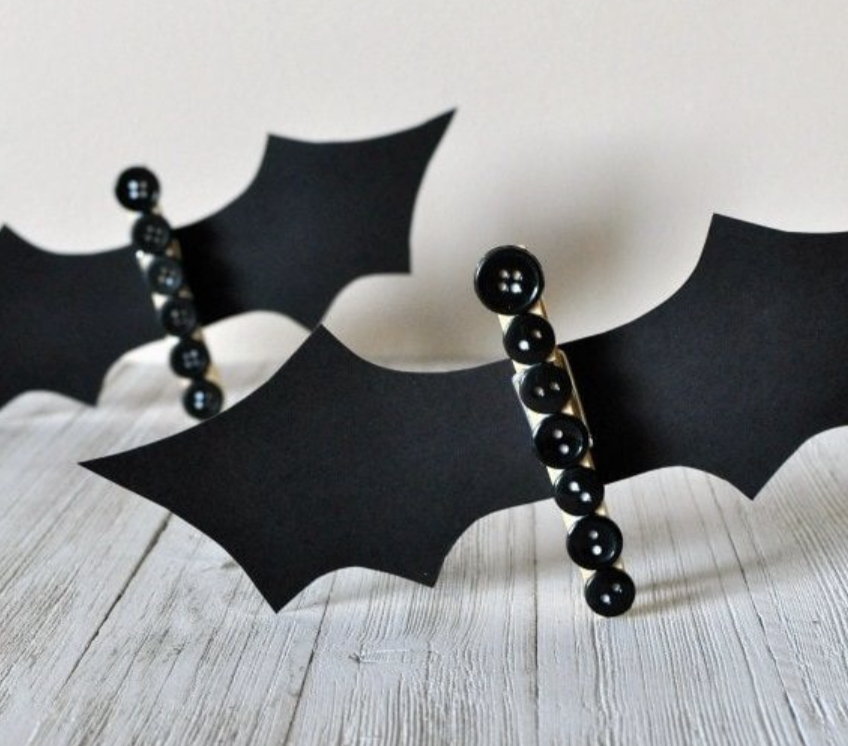
I Heart Crafty Things
Materials:
Directions:
1. Start by adding a line of tacky glue down the front of your clothespin. Then add buttons onto
the glue. Try not to let the buttons hang over the ends of the clothespin or they won’t be able to
stand up properly.
2. Cut out bat wings from your black cardstock paper. To make my wings I folded by black
cardstock in half and drew half of a wing along the folded edge. Then when I cut it out, I
unfolded my paper and had two full wings.
3. Add a line of glue down the center of your bat wings and glue it onto the back of your
clothespin. Once your glue is dry you can play with your bats.
Idea: These look great (and scary!) hanging from curtains!
3. Bubble Paint Monsters
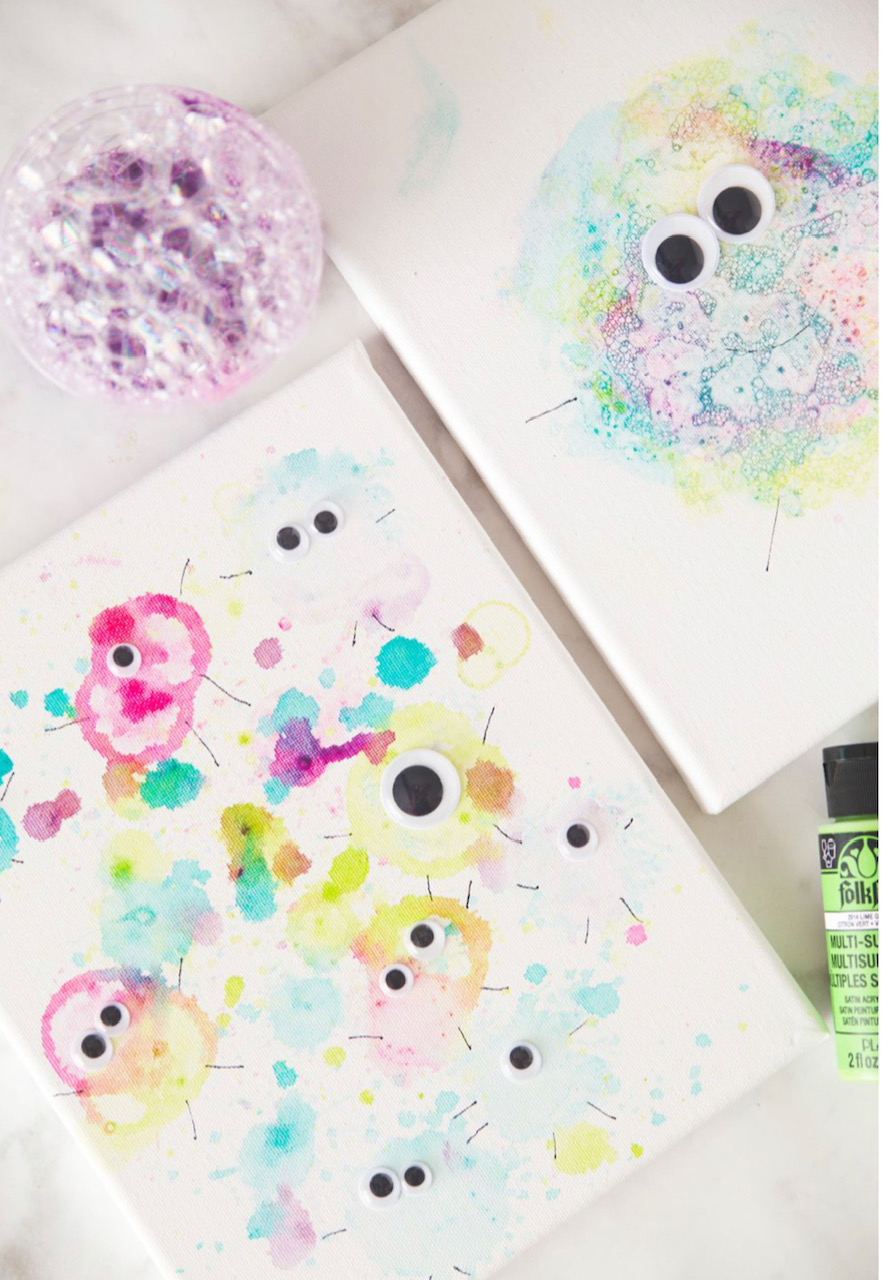
- Craft paint
- Dish soap
- Straws
- Canvas boards or cardstock paper
- Googly eyes (preferrably self-adhesive or else you’ll need glue)
Directions:
1. Add about 2 tablespoons of paint into a small plastic cup with 2 tablespoons of dish soap to
each color. Then add 1/2 cup of water to each color. The measurements don’t have to be exact.
2.Once your paint mixture is completely mixed together, carefully blow into the paint to create
bubbles. You know…the kind of bubbles we all blew in our milk and then got scolded about.
This step is not for small children. Make sure your children know how to properly blow into the
straw without accidentally getting the paint mixture in their mouth. If your children are too
little, you can blow the bubbles for them.
3.If you are using a piece of cardstock you can just lay the piece of paper carefully on top of the bubbles. If you use a canvas, pick up the bubbles with a straw and push them around on the
canvas. Be careful not to move the bubbles around too much. You want to be able to get that
pretty bubble look on your art piece.
4. Once your artwork has completely dried, decorate it! We made our little splashes of color
into friendly monsters. Draw legs and arms and add googly eyes or whatever you have in hand.
Idea: Once Halloween is over you can remove the eyes and have year-round, because it looks like a beautiful water color!
4. Pumpkin Tic Tac Toe
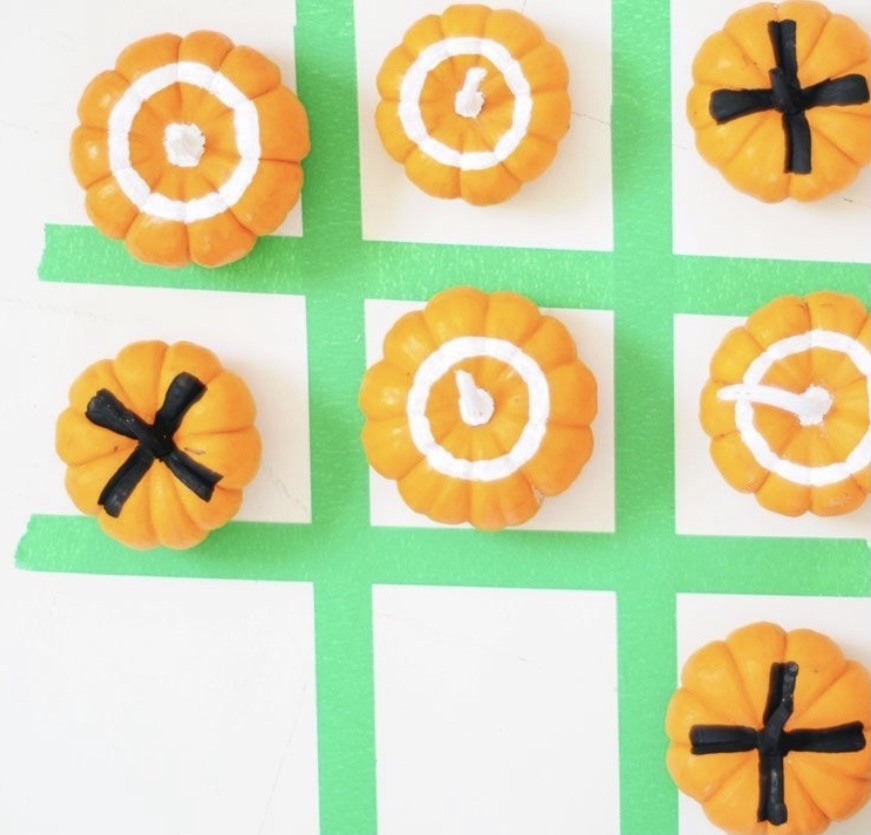
I saved this one for last because it’s my favorite and the easiest!
Materials:
- 10 mini pumpkins (real or fake)
- Black & white craft paint
- Paint brush
- Painter’s tape
Directions:
1. Wash and dry the pumpkins (if real)
.
2. On five of the pumpkins, paint “X” with either white or black paint. On the other five, paint
“O” in the other color. You can paint the stem too if there is one! Allow to dry.
3. With painter’s tape (my favorite is Frog Tape), make a Tic Tac Toe board on the floor/counter and have fun!
Have a spooky time making these with your little goblins!

0